
This is the first post of our 4-part series on Advanced Functions programming techniques. We’ve also covered the Key-Value Store, triggering 3rd party web services, and Event Handler Types.
In this tutorial, we dive into a simple example of how to deploy highly-secure encrypted data streams with advanced serverless event handling, based on meta attributes. We’ll demonstrate the encryption in a real-time Angular 2 web app.
Encryption is Paramount
Encryption is extremely important for a variety of use cases, from healthcare and government to advanced IoT and messaging use cases. Using layers of encryption ensures that application data and functionality are safe from eavesdropping and tampering. However, once all the encryption is in place, it can be difficult to implement other features (such as alerting or quality of service).
In this application, we implement a message “severity” field so that users can tag message events with an importance level, and these tags can be used within our Functions handler to take specific actions (for example, calling an Ops Management API, sending an SMS or email, or even just decorating the message with additional meta attributes).
As real-time apps gain traction in real-world situations, there are three primary infrastructure requirements that come to mind.
High Availability: For services that provide critical services to connected vehicles, homes, and businesses, there can be no downtime. When all HVAC, doors, lights, security systems and windows are controlled by devices, that means there must always be a data connection!
High Performance: Since recording, processing media, encoding/decoding speech, and translating text are latency-critical operations (especially on slower, bandwidth-constrained mobile data networks), response time is critical for user experience and building trust.
High Security: These services carry private user communications and data that controls cars and homes, so there must be clear capabilities for locking down and controlling access to authorized users and applications.
Encryption and PubNub
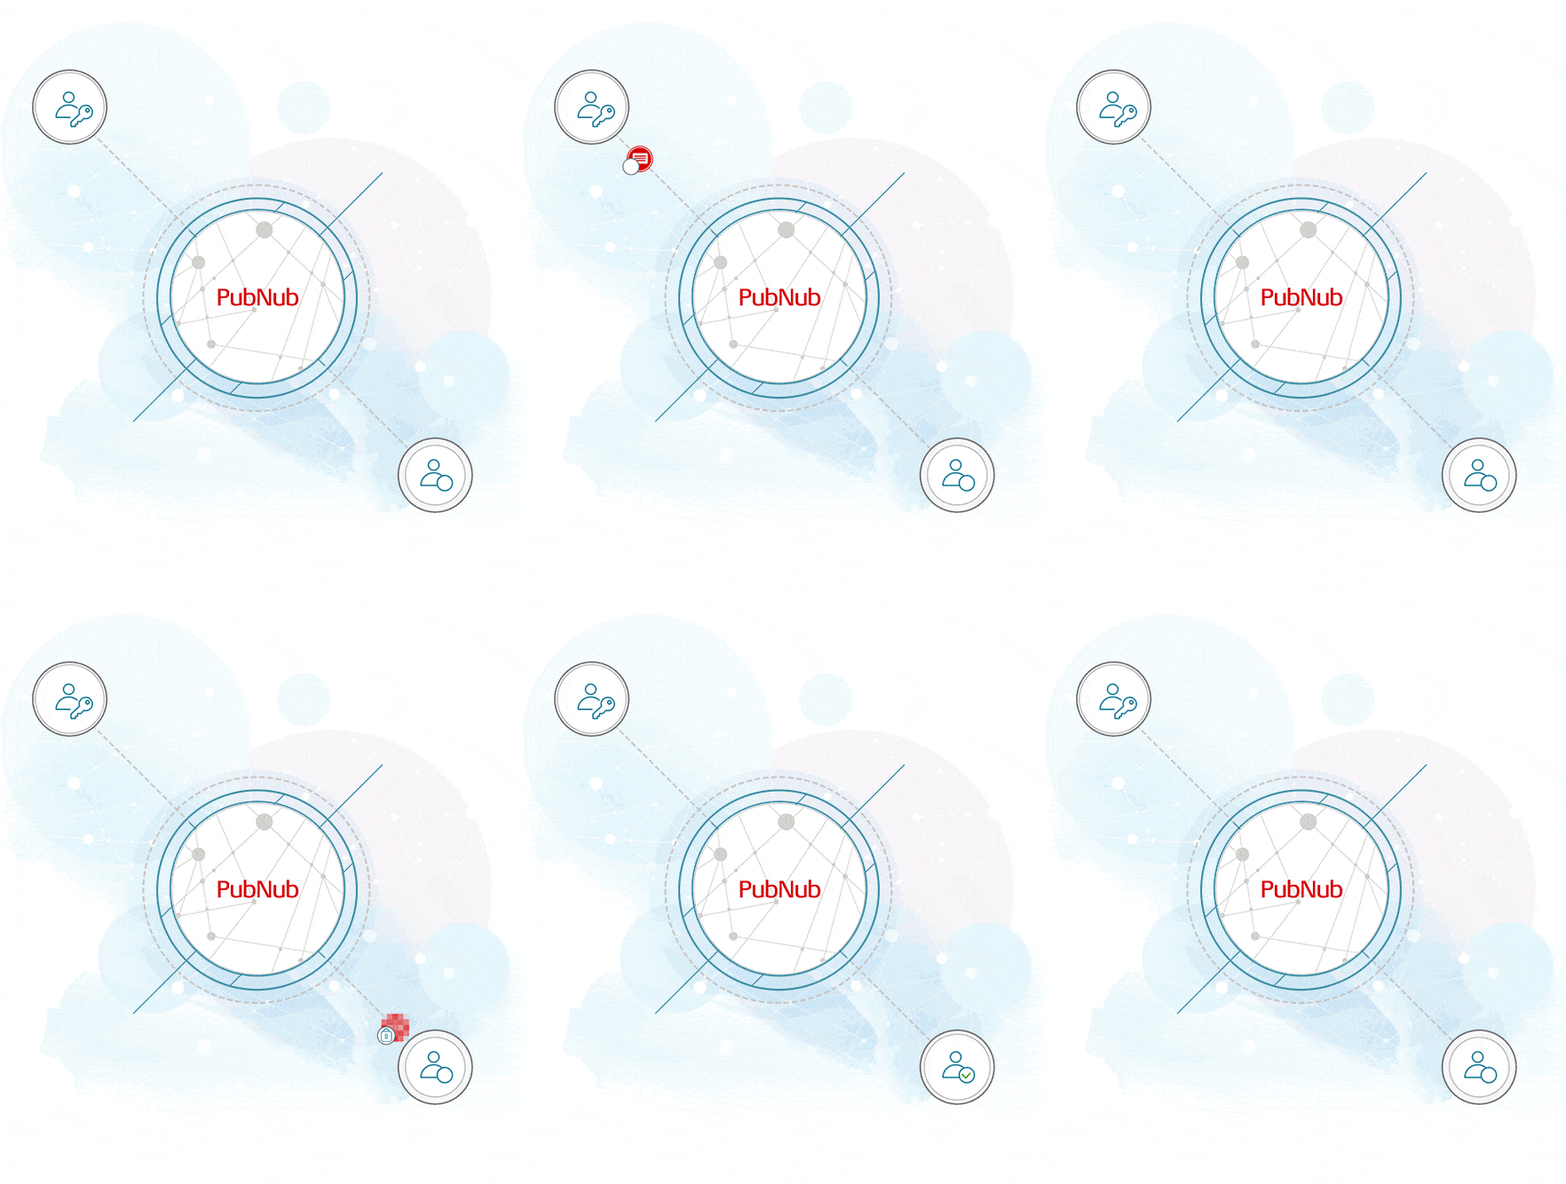
These 3 requirements, Availability, Performance, and Security, are exactly where the PubNub Data Stream Network comes into the picture. PubNub is a global data stream network that provides “always-on” connectivity to just about any device with an internet connection (there are now over 70+ SDKs for a huge range of programming languages and platforms). PubNub’s Publish-Subscribe messaging provides the mechanism for secure channels in your application, where servers and devices can publish and subscribe to structured data message streams in real time: messages propagate worldwide in under a quarter of a second (250ms for the performance enthusiasts out there).
In addition to those 3 strengths, we take advantage of Functions, an awesome new PubNub feature that allows us to decorate messages with supplementary data. In this article, we create a PubNub BLOCK of JavaScript that runs entirely in the network and analyzes message “meta” attributes (with zero knowledge of the message contents) to enable advanced processing so that the web client UI code can stay simple and just display the messages. With Functions, it’s very easy to integrate third-party applications into your data stream processing. You can find the complete catalog of pre-made Functions here.
As we prepare to explore our sample Angular2 web application with data stream encryption and meta attribute handling, let’s check out the underlying PubNub API features that make it all possible.
Data Stream Encryption
Designing secure applications is challenging enough – PubNub makes implementation much easier by integrating enterprise-grade security into a huge (and growing!) number of client toolkits. The SDKs we’ve personally used with encryption include JavaScript, Java, Android, iOS, Ruby and Python. If you’re using another language, check out theSDK page – chances are, it’s already supported!
The first layer of security is high-grade HTTPS/TLS security. This applies to the PubNub connection itself and is enabled via the ssl:true configuration option. This means that traffic between your client app and PubNub is protected from eavesdropping (as long as the client is not configured to allow MITM/man-in-the-middle TLS traffic inspection). For more information, see this link.
The next layer of security is end-to-end encryption using 256-bit AES. To enable this, we use the cipherKey:'YOUR_SUPER_SECRET_CIPHER_KEY' attribute. When this feature is enabled, it means that even an observer inside the PubNub network could not decrypt your message payloads (only clients knowing the secret/shared key). For more information, see this link as well. Note: for maximum security, we advise that the cipherKey attribute (and ideally, other PubNub credentials) should only be transmitted to clients who have already been successfully authenticated using your application’s auth mechanism (in contrast to this sample app, which does not feature app-level authentication).
In addition, PubNub supports advanced capability-based access control using Access Manager. This allows developers to give fine-grained client access to applications that can expire at a specified time or last indefinitely. Although we won’t go into the details here, we highly recommend checking out the feature here.
This encryption covers a lot of ground in terms of the data stream messages themselves, but we thought it would be worthwhile to note a few commonly used items that aren’t guaranteed to be encrypted within the PubNub network (although they are encrypted over client TLS). You should be aware of these cases when designing your application.
- Presence & Custom State : when using presence features and custom state, UUIDs and state values are not encrypted under the hood
- Channel Names : channel names are not encrypted, so for maximum security make them hard to guess (or use Access Manager to restrict access)
- Meta Attributes : in our case, this is a desirable feature (we use meta attributes for Functions signaling) – but just keep that in mind!
Since you’re reading this at PubNub, we’ll presume you have a real-time application use case in mind, such as ride-hailing, messaging, IoT or other. In the sections below, we’ll dive into the encrypted data stream use case, saving other security use cases for the future.
Obtaining your PubNub Developer Keys
The first things you’ll need before you can create a real-time application with PubNub are publish and subscribe keys. Just in case you haven’t already, you can create an account, get your keys and be ready to use the PubNub network in less than 60 seconds using the handy signup form.
Once you do that, the publish and subscribe keys look like UUIDs and start with “pub-c-” and “sub-c-” prefixes respectively. Keep those handy – you’ll need to plug them in when initializing the PubNub object in your HTML5 app below.
Setting up the BLOCK
With Functions, it’s really easy to create code to run in the network. Here’s how to make it happen:
Go to the application instance on the PubNub Admin Dashboard.
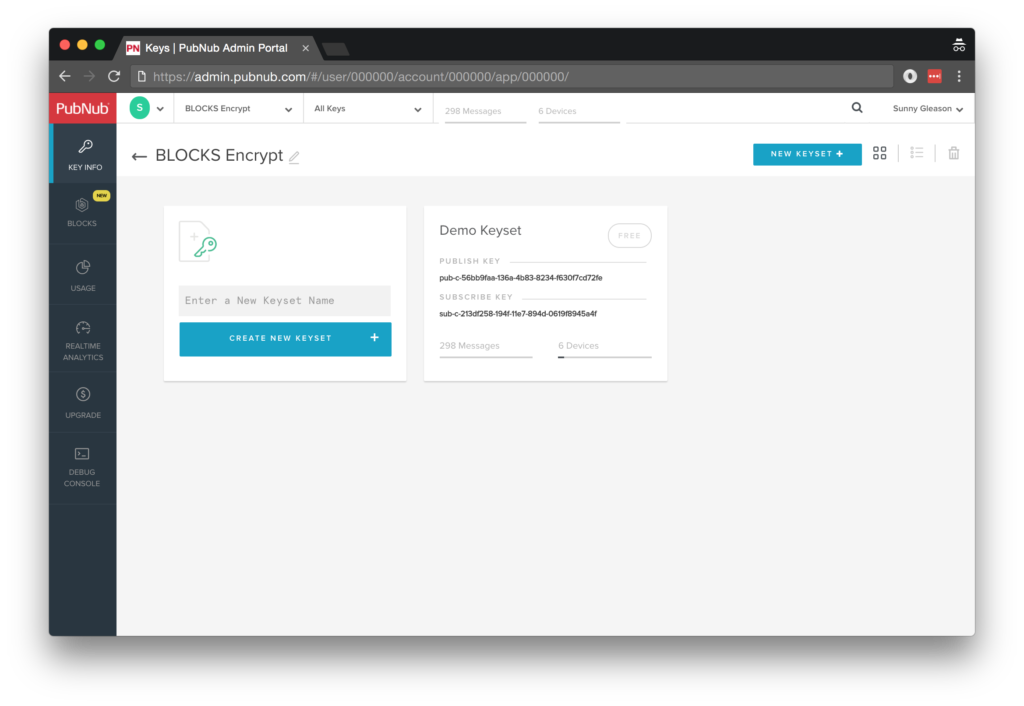
Create a new block.
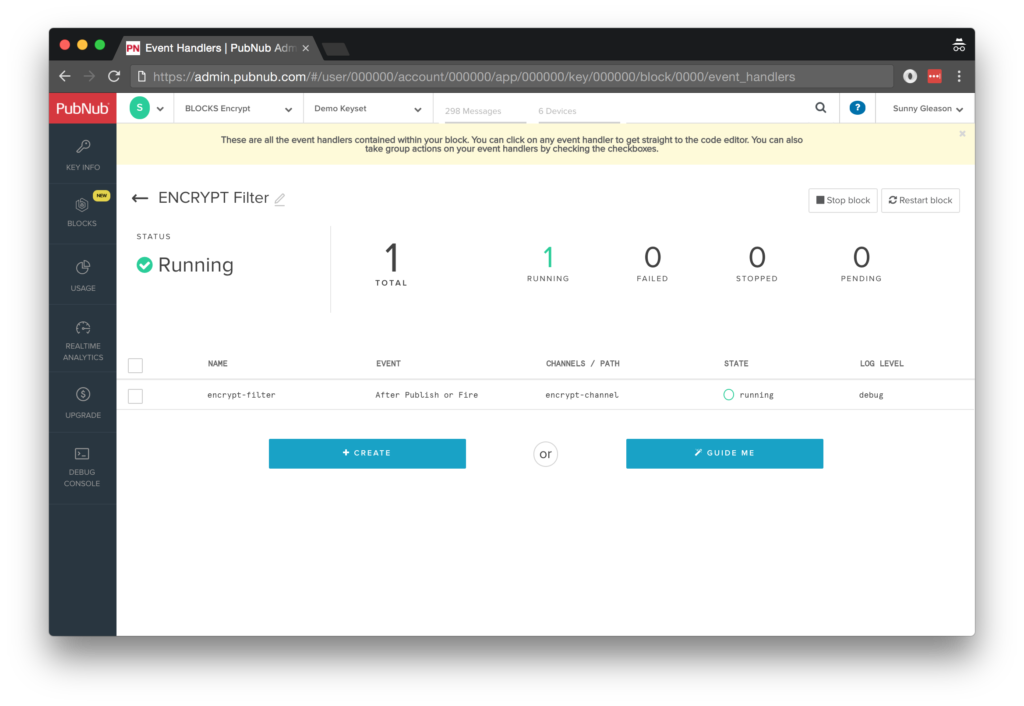
Paste in the block code from the next section.
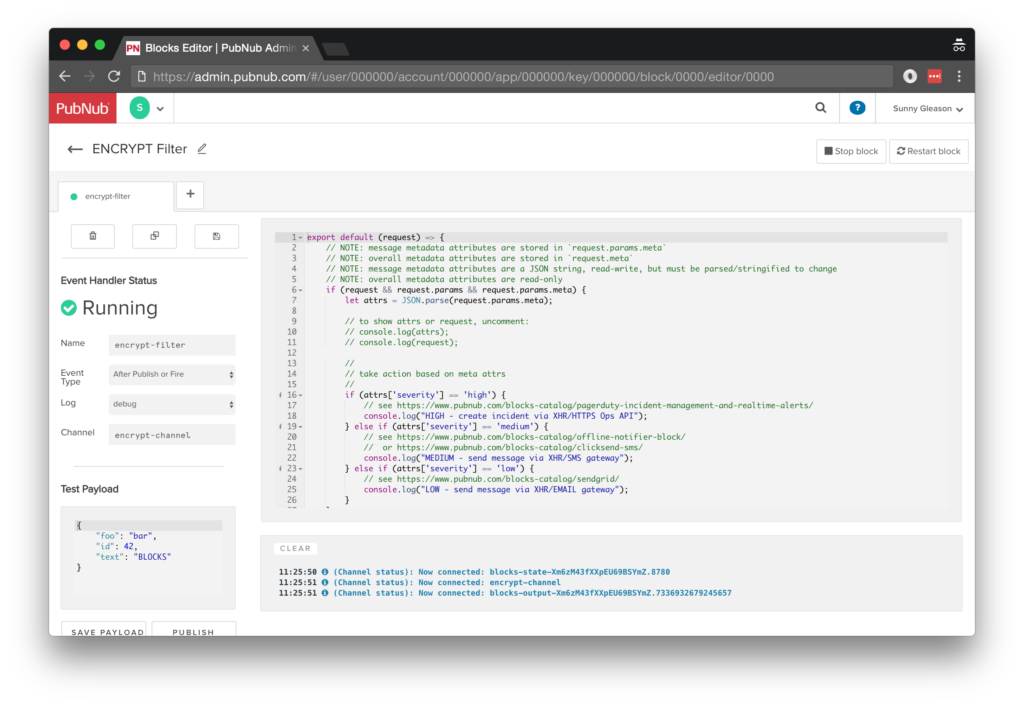
Start the block, and test it using the “publish message” button and payload on the left-hand side of the screen.
That’s all it takes to create your serverless code running in the cloud!
Diving into the Code – the BLOCK
You’ll want to grab the 32 lines of BLOCK JavaScript and save them to a file, say, pubnub_encrypt_block.js. It’s available as a Gist on GitHub for your convenience.
First up, we create a function to handle incoming messages. You’ll notice a few comments here that describe the payload of the message. In our case, the message itself is encrypted, so we concentrate on the “meta” attributes.
export default (request) => {
    // NOTE: message metadata attributes are stored in `request.params.meta`
    // NOTE: overall metadata attributes are stored in `request.meta`
Next, we consider the content of the request.params.meta string.
// NOTE: message metadata attributes are a JSON string, read-write, but must be parsed/stringified to change
// NOTE: overall metadata attributes are read-only
if (request && request.params && request.params.meta) {
We parse the string into JSON if available:
let attrs = JSON.parse(request.params.meta);
// to show attrs or request, uncomment:
// console.log(attrs);
// console.log(request);
Next, we take one of three actions based on the incoming severity meta attribute. In this case, we have placeholders for creating an “incident” with high severity, firing off an SMS, or sending email in the case of low severity.
    //
    // take action based on meta attrs
    //
    if (attrs['severity'] == 'high') {
        // see https://www.pubnub.com/docs/blocks-catalog/pagerduty-incident-management-and-realtime-alerts
        console.log("HIGH - create incident via XHR/HTTPS Ops API");
    } else if (attrs['severity'] == 'medium') {
        // see https://www.pubnub.com/docs/blocks-catalog/offline-notifier-block
        //  or https://www.pubnub.com/docs/blocks-catalog/clicksend-sms
        console.log("MEDIUM - send message via XHR/SMS gateway");
    } else if (attrs['severity'] == 'low') {
        // see https://www.pubnub.com/docs/blocks-catalog/sendgrid
        console.log("LOW - send message via XHR/EMAIL gateway");
    }
}
For your application, we imagine you’ll integrate with one or more of the thousands of web services out there to take action based on the message severity.
Finally, we pass the message on unmodified. (In the case of “after publish or fire” Functions, we cannot modify the message anyway since it has already been published).
    // NOTE - pass on message unchanged (must when
    // cipherKey encryption is used by clients)
    return request.ok();
}
All in all, it doesn’t take a lot of code to meta attribute processing to our application. We like that!
OK, let’s move on to the UI!
Diving into the Code – the User Interface
You’ll want to grab these 109 lines of HTML & JavaScript and save them to a file, say, pubnub_encrypt_ui.html.
The first thing you should do after saving the code is to replace two values in the JavaScript:
- YOUR_PUB_KEY: with the PubNub publish key mentioned above.
- YOUR_SUB_KEY: with the PubNub subscribe key mentioned above.
Additionally, we suggest changing the following:
- CHANGE_ME_TO_SUPER_SECRET_STRING: to your own super-secret shared key
If you don’t, the UI will not be able to communicate with anything and probably clutter your console log with entirely too many errors.
For your convenience, this code is also available as a Gist on GitHub, and a Codepen as well. Enjoy!
Dependencies
First up, we have the JavaScript code & CSS dependencies of our application.
<!DOCTYPE html>
<html>
  <head>
    <title>Angular 2</title>
    <script src="https://unpkg.com/core-js@2.4.1/client/shim.min.js"></script>
    <script src="https://unpkg.com/zone.js@0.7.2/dist/zone.js"></script>
    <script src="https://unpkg.com/reflect-metadata@0.1.9/Reflect.js"></script>
    <script src="https://unpkg.com/rxjs@5.0.1/bundles/Rx.js"></script>
    <script src="https://unpkg.com/@angular/core/bundles/core.umd.js"></script>
    <script src="https://unpkg.com/@angular/common/bundles/common.umd.js"></script>
    <script src="https://unpkg.com/@angular/compiler/bundles/compiler.umd.js"></script>
    <script src="https://unpkg.com/@angular/platform-browser/bundles/platform-browser.umd.js"></script>
    <script src="https://unpkg.com/@angular/forms/bundles/forms.umd.js"></script>
    <script src="https://unpkg.com/@angular/platform-browser-dynamic/bundles/platform-browser-dynamic.umd.js"></script>
    <script src="https://unpkg.com/pubnub@4.3.3/dist/web/pubnub.js"></script>
    <script src="https://unpkg.com/pubnub-angular2@1.0.0-beta.8/dist/pubnub-angular2.js"></script>
    <link rel="stylesheet" href="https://maxcdn.bootstrapcdn.com/bootstrap/3.3.7/css/bootstrap.min.css" />
    <link rel="stylesheet" href="https://maxcdn.bootstrapcdn.com/bootstrap/3.3.7/css/bootstrap-theme.min.css" />
  </head>
For folks who have done front-end implementation with Angular2 before, these should be the usual suspects:
- CoreJS ES6 Shim, Zone.JS, Metadata Reflection, and RxJS : Dependencies of Angular2.
- Angular2 : core, common, compiler, platform-browser, forms, and dynamic platform browser modules.
- PubNub JavaScript client: to connect to our data stream integration channel.
- PubNub Angular2 JavaScript client: provides PubNub services in Angular2 quite nicely indeed.
In addition, we bring in the CSS features:
- Bootstrap: in this app, we use it just for vanilla UI presentation.
Overall, we were pretty pleased that we could build a nifty UI with so few dependencies. And with that… on to the UI!
The User Interface
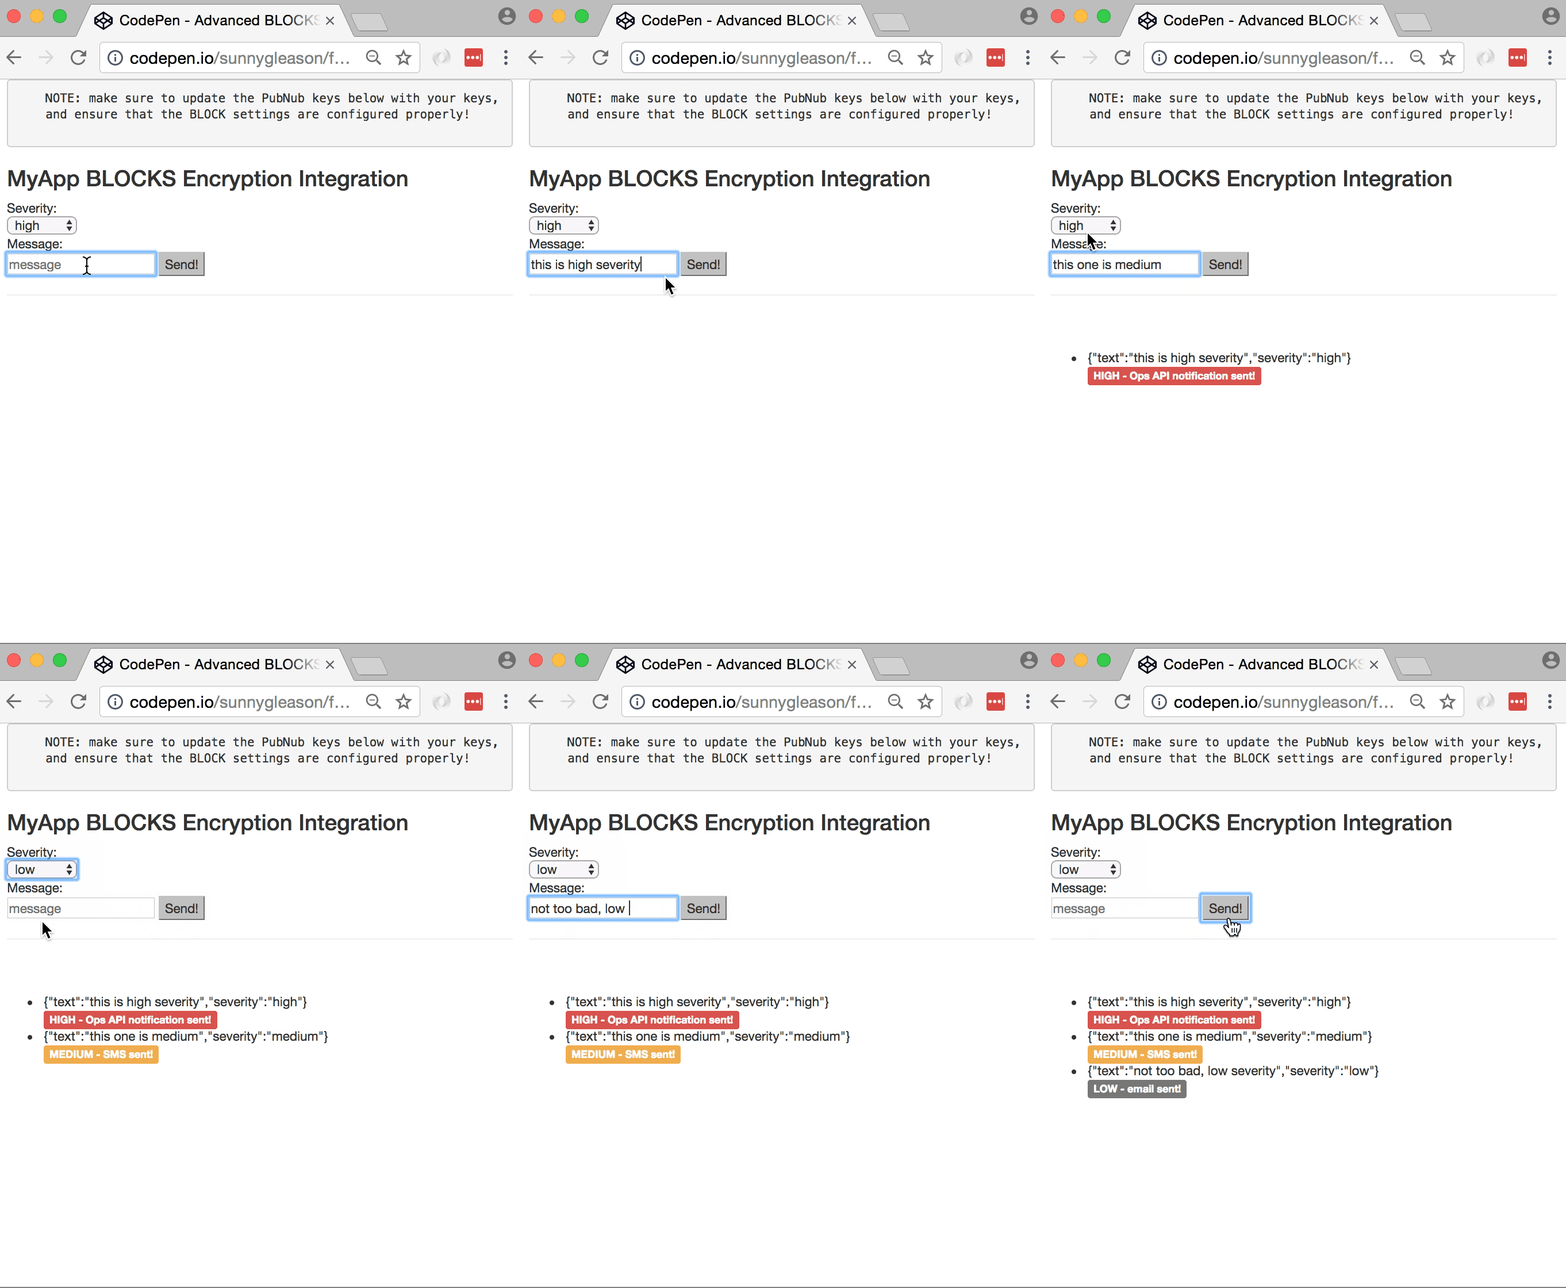
Here’s what we intend the UI to look like:
image
The UI is pretty straightforward – everything is inside a main-component tag that is managed by a single component that we’ll set up in the Angular2 code.
<body>
  <main-component>
    Loading...
  </main-component>
Let’s skip forward and show that Angular2 component template. The h3 heading should be pretty self-explanatory. We provide a text box for the message, a select box for the severity and a simple button to perform the publish()action to send a request to be processed by the BLOCK.
<div class="container">
    <pre>
    NOTE: make sure to update the PubNub keys below with your keys,
    and ensure that the BLOCK settings are configured properly!
    </pre>
    <h3>MyApp Functions Encryption Integration</h3>
    Severity:
    <br />
    <select [(ngModel)]="severity">
      <option value="high">high</option>
      <option value="medium">medium</option>
      <option value="low">low</option>
    </select>
    <br />
    Message:
    <br />
    <input type="text" [(ngModel)]="toSend" placeholder="message" />
    <input type="button" (click)="publish()" value="Send!" />
    <hr/>
    <br/>
    <br/>
    <ul>
      <li *ngFor="let item of messages.slice()">
        <div>{{JSON.stringify(item.message)}}</div>
        <div *ngIf="item.message.severity == 'high'" class="label label-danger">HIGH - Ops API notification sent!</div>
        <div *ngIf="item.message.severity == 'medium'" class="label label-warning">MEDIUM - SMS sent!</div>
        <div *ngIf="item.message.severity == 'low'" class="label label-default">LOW - email sent!</div>
      </li>
    </ul>
</div>
The component UI consists of a simple list of events (in our case, the message objects). We iterate over the messages in the component scope using a trusty ngFor. Each message includes the data from the network. In our case, the payloads are encrypted and include a duplicate severity attribute (equal to the meta severity attribute) to simplify the UI code.
And that’s it – a functioning real-time UI in just a handful of code (thanks, Angular2)!
The Angular2 Code
Right on! Now we’re ready to dive into the Angular2 code. It’s not a ton of JavaScript, so this should hopefully be pretty straightforward.
The first lines we encounter set up our application (with a necessary dependency on the PubNub AngularJS service) and a single component (which we dub main-component).
<script>
var app = window.app = {};
app.main_component = ng.core.Component({
    selector: 'main-component',
    template: `...see previous...`
The component has a constructor that takes care of initializing the PubNub service and configuring the channel name, auth keys, and initial values. NOTE: make sure the channel matches the channel specified by your BLOCK configuration and the BLOCK itself!
}).Class({
    constructor: [PubNubAngular, function(pubnubService){
        var self = this;
        self.pubnubService = pubnubService;
        self.channelName = 'encrypt-channel';
        self.JSON = JSON;
        self.messages = [];
        self.toSend = "";
        self.severity = "high";
Early on, we initialize the pubnubService with our credentials. Note the use of the cipherKey setting to enable end-to-end data stream encryption.
pubnubService.init({
    publishKey: 'YOUR_PUB_KEY',
    subscribeKey: 'YOUR_SUB_KEY',
    cipherKey: 'CHANGE_ME_TO_SUPER_SECRET_STRING',
    ssl:true
});
We subscribe to the relevant channel, create a dynamic attribute for the messages collection, and configure a blank event handler since the messages are presented unchanged from the incoming channel.
    pubnubService.subscribe({channels: [self.channelName], triggerEvents: true});
    self.messages = pubnubService.getMessage(this.channelName,function(){
      // no handler necessary, dynamic collection of msg objects
    });
}],
We also create a publish() event handler that performs the action of publishing the new message to the PubNub channel. Note that we use the meta attributes section to publish the severity attribute in the message envelope, and duplicate the severity attribute in the message itself for UI convenience.
    publish: function(){
        this.pubnubService.publish({
          channel: this.channelName,
          message: {text:this.toSend, severity:this.severity},
          meta: {severity:this.severity}
        });
        this.toSend = "";
    }
});
Now that we have a new component, we can create a main module for the Angular2 app that uses it. This is pretty standard boilerplate that configures dependencies on the Browser and Forms modules and the PubNubAngular service.
app.main_module = ng.core.NgModule({
    imports: [ng.platformBrowser.BrowserModule, ng.forms.FormsModule],
    declarations: [app.main_component],
    providers: [PubNubAngular],
    bootstrap: [app.main_component]
}).Class({
    constructor: function(){}
});
Finally, we bind the application bootstrap initialization to the browser DOM content loaded event.
document.addEventListener('DOMContentLoaded', function(){
    ng.platformBrowserDynamic.platformBrowserDynamic().bootstrapModule(app.main_module);
});
We mustn’t forget close out the HTML tags accordingly.
});
</script>
</body>
</html>
Not too shabby for about 109 lines of HTML & JavaScript!
Functions References & Diving Deeper
There are a couple other things worth mentioning with respect to encrypted data streams.
You can find detailed documentation here and here.
- Server-Side Filtering : using meta attributes and the stream controller API
- History and Replay : using the storage & playback APIs
- Presence : real-time status and custom state using the presence API
- And more!
All in all, we found it pretty easy to use advanced message processing features on encrypted data streams using the API, and we look forward to using some of the more advanced capabilities in our secure messaging applications!
Conclusion
Thank you so much for joining us in the encrypted data streams post of our Advanced Functions Techniques series! Hopefully it’s been a useful experience learning about working with encrypted data streams. In future articles, we’ll dive deeper into additional techniques for crafting Functions and integrating other nifty services in real time web applications.
Stay tuned, and please reach out anytime if you feel especially inspired or need any help!