Team Chat is our sample group chat app. It includes user management, multiple group conversations, online/offline presence status, and more. Its UI is built in React, and it uses the PubNub Redux framework to manage client state in the application. Following this approach allows you to easily implement in-app chat for your own application.
React Chat App Tutorial Overview
This is part 1 of a multi-part tutorial that walks through how Team Chat’s key features are put together, and how you can add them in your own applications. In this part, we’ll cover logging in with a user, showing multiple conversations, and exchanging messages in a group with other users.
Part 2 covers joining and leaving conversations, working with occupancy and network status, and profanity filtering. Head over there once you're through part 1 to expand the functionality of your application.
The Github repository for the project can be found here.
React Chat App Frameworks and SDKs
React
Our React framework provides tools to leverage the PubNub JavaScript SDK within a React application by making use of React features like Provider and Consumer patterns and React Hooks. View reference docs.
Redux
Our Redux framework makes it easier for you to manage the state of data components inside an application. The framework adds structured data to the Redux store, listens to real-time events generated by the network, stores these events on the client side, and triggers updates to the view inside your application. View reference docs.
Javascript
Our React and Redux frameworks have a dependency on the Javascript SDK to manage connections and communicate with the PubNub network. View reference docs.
Prerequisites
PubNub Account - to run this app, you must create an account with PubNub and obtain your publish and subscribe keys. If you don't already have an account, you can create one for free.
Node.js (10+) - make sure that you have a recent version of Node installed. To check what version you’re running, type node --version into a terminal window.
A Git client - but chances are good you’ve already got one installed.
Run the app
1. Clone the Github repository.
2. Navigate to the root directory
3. Run the app. The first time you run the app, it will prompt you for your publish and subscribe keys from your account. If you don’t have an account, you can create one for free from the PubNub Dashboard.
You should now have the app running in your local web browser. When you're done, type Control-C in the terminal window to exit.
When you run the app for the first time, it runs the setup/populate.js script to populate sample data for users, spaces, and memberships into your PubNub keys. You can make changes to the sample data by editing the input_data.json file.
Initialize the PubNub Client
When the app first loads, it runs the main/App.tsx component to initialize the pubnub client with your publish and subscribe keys that are configured in the config/pubnub-keys.json file.
The component also calls pubnub.addListener() to register all listeners at once (message listener, presence listener, and so on). The listener triggers events when the app receives messages, and automatically dispatches reducers to update the local store.
Log in with a User
While the splash screen displays, the app is selecting a user for you, and retrieving the conversations to which your user is subscribed. Keep reading to see how this works.

The authentication/login/Login.tsx component displays a login screen and selects a random user to log into the application. The user is selected from the list of IDs defined in the knownUserIds.json file. These are the same users that were initially populated on your key.
Set a user
Once the app selects a user, the following code (in authentication/loginCommand.ts) calls pubnub.api.setUUID() to set the user’s ID on the pubnub object. This ID will be passed in all API calls to PubNub so that the network can identify the user who performs these operations.
We then call the fetchUserById() command to fetch user details from PubNub and store the logged in user in the local store.
Connect to conversations
Once the login is successful, we call the fetchMemberships() command to retrieve the user’s conversations from PubNub. The method returns a list of space memberships that were initially populated by the setup/populate.js script and stores these conversations in the local store.
Next, we call pubnub.api.subscribe() to open a real-time connection with PubNub and subscribe the user to the conversation channels. If a client is subscribed to one or more channels, it will start receiving the messages and events published on those channels. Subscribing with presence also subscribes you to presence channels so you can receive join and leave events, which allow you to show other users as online or offline on the app. (We’ll dive into detail on presence in a future post.)
Show User Details
In the top left section of the UI, the app shows details for the current user. These include an avatar image, the user’s name and title, and the user’s network status.

The currentUser/MyUserDetails.tsx component displays the details for the user like name, title and profileUrl. The component calls getUsersById() selector to retrieve these user details from the local store.
The component also calls the NetworkStatus component to show the user’s connection status. The next section has more details on network status.
Get network status
The currentUser/NetworkStatus/NetworkStatus.tsx component displays a green or gray dot to indicate if the user is connected to the network. The component calls the state.networkStatus.isConnected selector to get this connection status from the store.
Show Joined Conversations
Below your user info, you’ll find your list of conversations. The Introductions conversation is automatically selected when the app launches.
You can join other conversations with the + button, and leave existing conversations with the Exit button. We’ll dive into that in a future post.

The joinedConversations/MyConversations/MyConversations.tsx component gets the user’s list of conversations and allows the user to select a conversation. When the app loads, it selects the Introduction conversation by default.
Get conversations for user
The MyConversations component calls the getConversationsByUserId() selector to get the user’s conversations from the local store. This selector returns the list of conversations, along with properties like id and name, to be displayed in the UI.
Send and Receive Messages
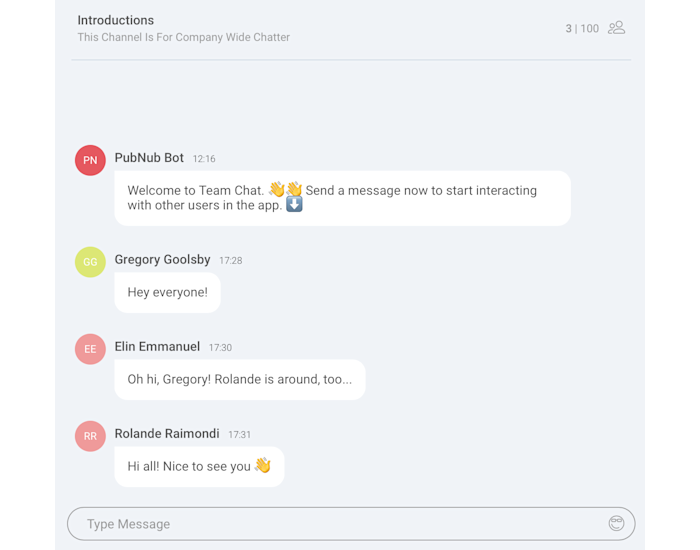
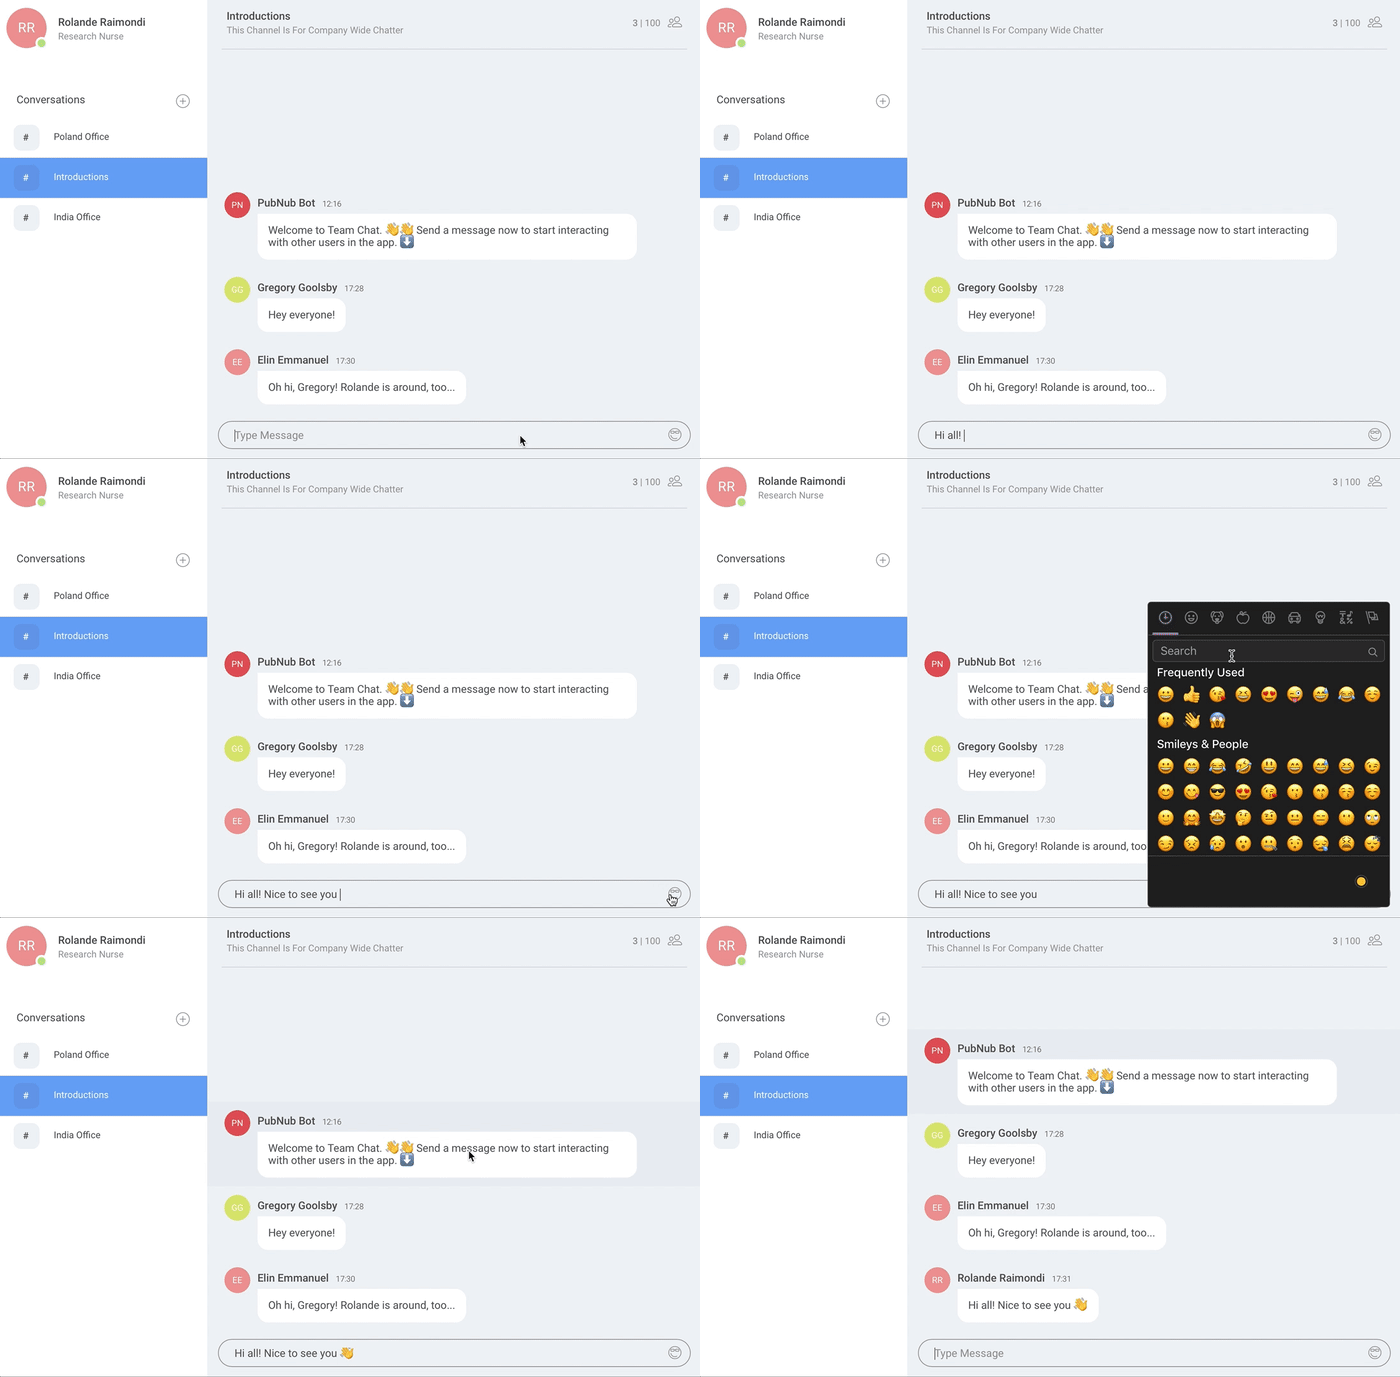
Along the top of the conversation pane, the app displays details about the conversation: a title, description, and membership and presence information. Below that, the app shows messages in the conversation as they arrive. At the bottom, we have a component to let us input text and emoji.

Once a conversation is selected, the currentConversation/CurrentConversation/CurrentConversation.tsx component displays details of the conversation as well as its messages. There are three sub-components:
Header includes the conversation name, description, and occupancy count
MessageList shows the messages in the conversation (we’ll talk about this in the next section)
MessageInput shows the text input area and emoji picker (we’ll talk about this in the next section, too)
Show the current conversation
The currentConversation/Header/Header.tsx component calls getConversationsById() to get details of the selected conversation from the local store, and renders them in the UI.
We’ll explain the MessageList and MessageInput components in the next section.
Send messages
The currentConversation/MessageInput/MessageInput.tsx component renders the text input field and emoji picker.
Send Message Command
The sendMessageAction() method (in messages/sendMessageCommand.ts) sends your message to the other users in the conversation. It calls the sendMessage() command to publish a message to PubNub on the conversation channel. The message includes sender details.
Add emoji to a message
The MessageInput.tsx component also includes an emoji/EmojiInput/EmojiInput.tsx component to add emoji in a message. The component uses the emoji-mart library to render emoji on the screen. If an emoji is selected, it adds that emoji to the message input.
Receive messages
The currentConversation/MessageList/MessageList.tsx component displays the list of messages when they are received by the app. The component calls the getCurrentConversationMessages() selector to fetch messages from the local store and render them on the screen.
Each message that is received includes the message text as well as the id of the user who published that message. This component calls the getUsersById() selector to fetch details for the user from the local store to display it alongside the message.
Go to the next section for more details on how a message is displayed.
Display a message
The Message/Message.tsx component styles a message and displays it in the UI. Messages are displayed with a timetoken, content, sender’s name and avatar. The message displays the sender as “unknown” if the user ID isn’t present in the local store.
The features/messages/messageModel.ts file calls createMessageReducer(), which responds to actions dispatched to update the state of messages in the store. The message state is automatically updated and the UI change is rendered as the app receives messages in a conversation.
Conclusion
That's it! You should now have a better understanding of how the team chat app uses the PubNub React and Redux frameworks and the underlying Javascript SDK to show user details, conversations, and send and receive messages with other users in the app. We’ll cover more features in future posts, including joining and leaving conversations, working with occupancy and network status, and profanity filtering.

As next steps, go to our React, Redux and Javascript reference docs to build your real-time application with PubNub.


