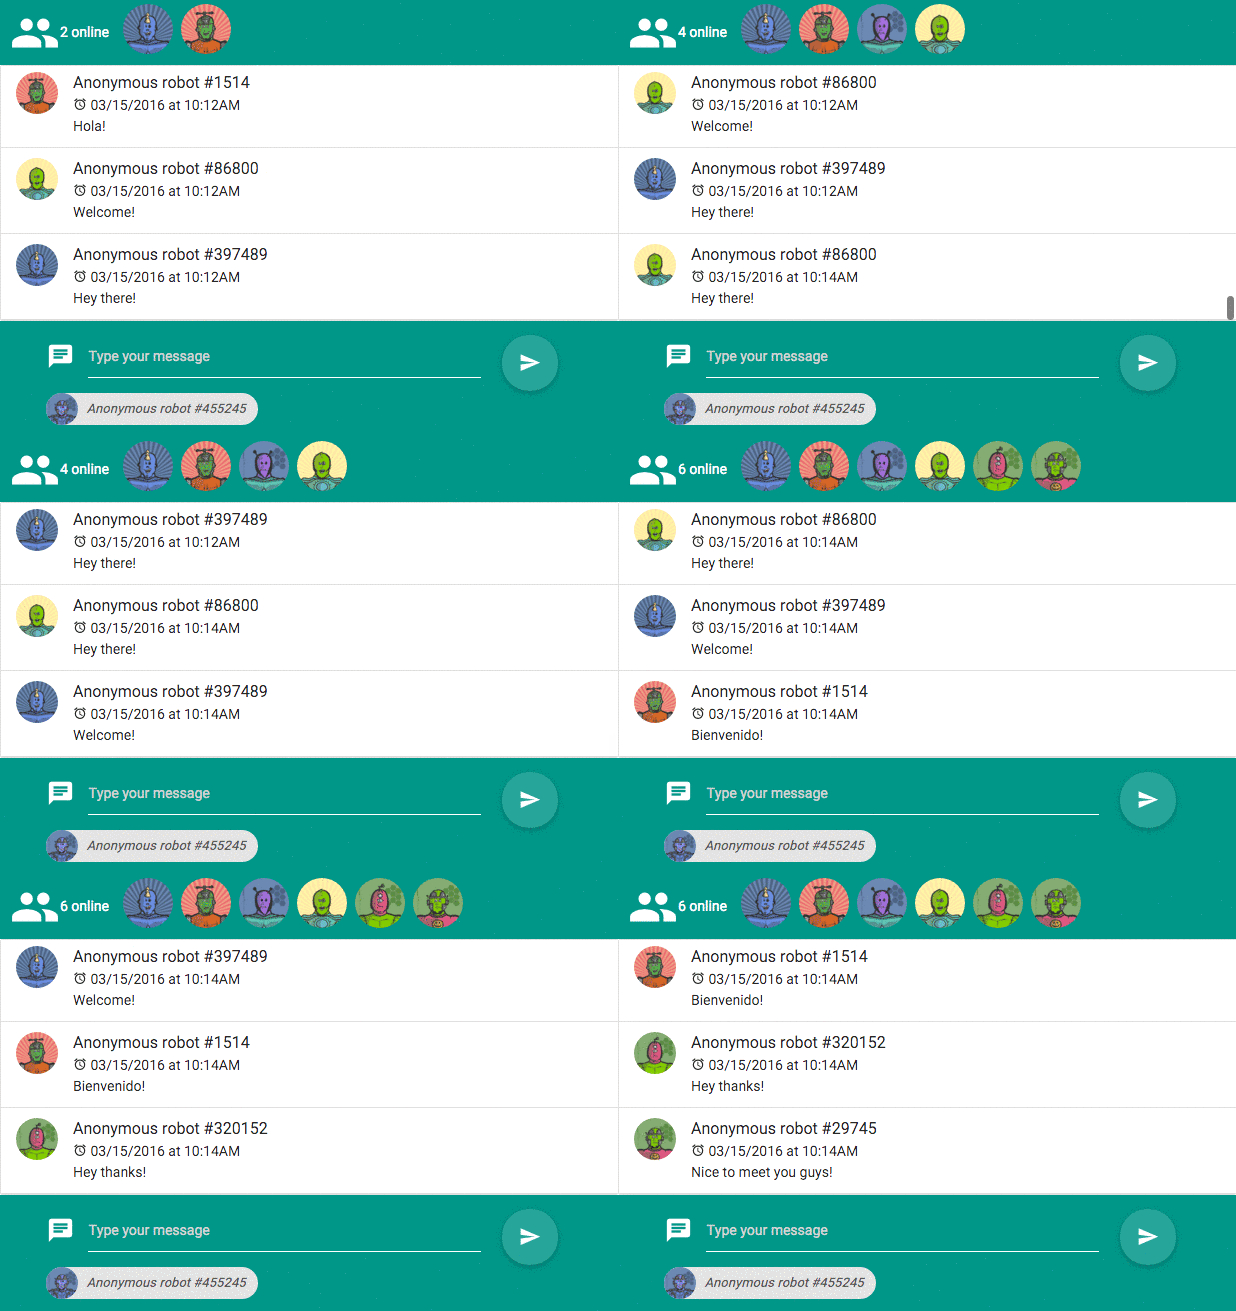
AngularJS Chat Tutorial: Storing History, Infinite Scroll
This tutorial walks through building chat with our core pub/sub technology (and other PubNub features). We recently launched ChatEngine, a new framework for rapid chat development.
Welcome to Part 2 of PubNub series on how to build a complete chat app with PubNub’s AngularJS SDK!
In this tutorial, we will walk through how to create a chat app with infinite scroll. Each time you scroll up to the top of the screen, the previous messages from the conversation will load automatically at runtime. Also, we will walk through all of the best AngularJS practices to build a well-structured AngularJS app.
This tutorial will walk through three topics:
- Creating a Message Service that will be receiving, storing and sending messages
- Building the chat messages user interface split into components
- Discussing and implementing features to provide an interesting user experience
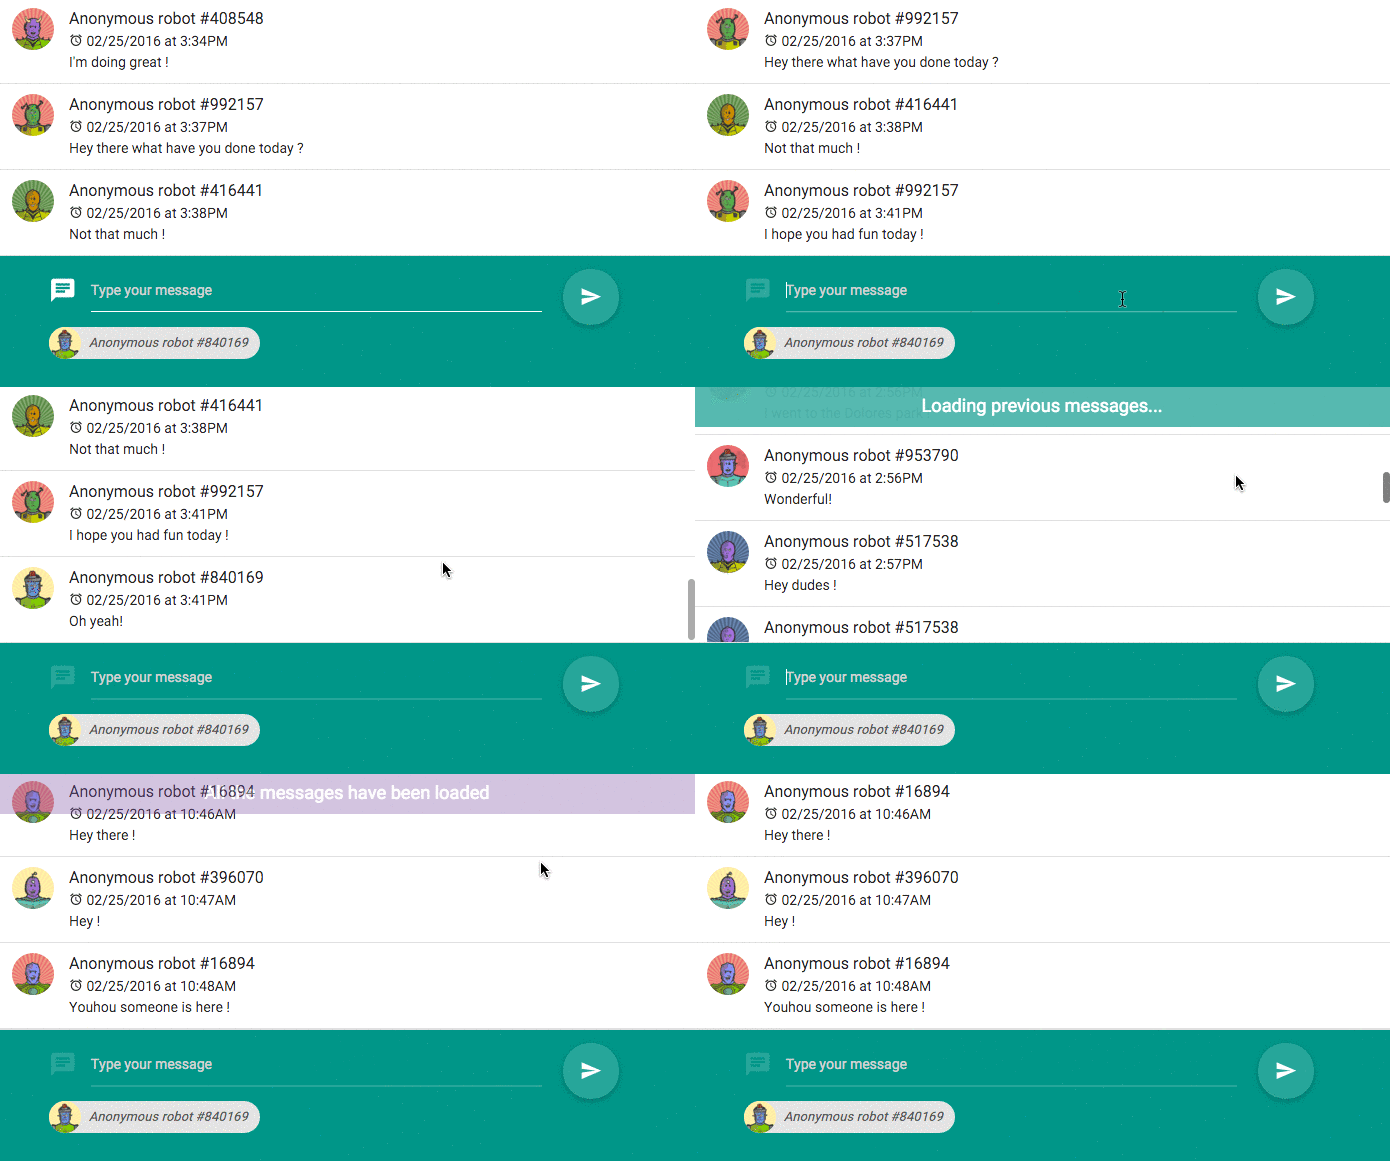
Here is how our chat app will look like at the end of this tutorial:
 |
Demo: The demo of the AngularJS chat app is available here |
 |
Source code: The source code is available in the github repository |
Application Architecture
As we are going to grow our app in the next tutorials to add more real-time features (user roster, typing indicator, etc..), it’s a good place to think about architecting the app better.
There are simple ways to architect our app. For example, we can use one controller and put everything in it: the message collection, the code related to PubNub, the view helpers, etc. Also, all of the markups to render view in one big HTML file like this:

However, it’s not ideal. Below would be a better architecture for our app:
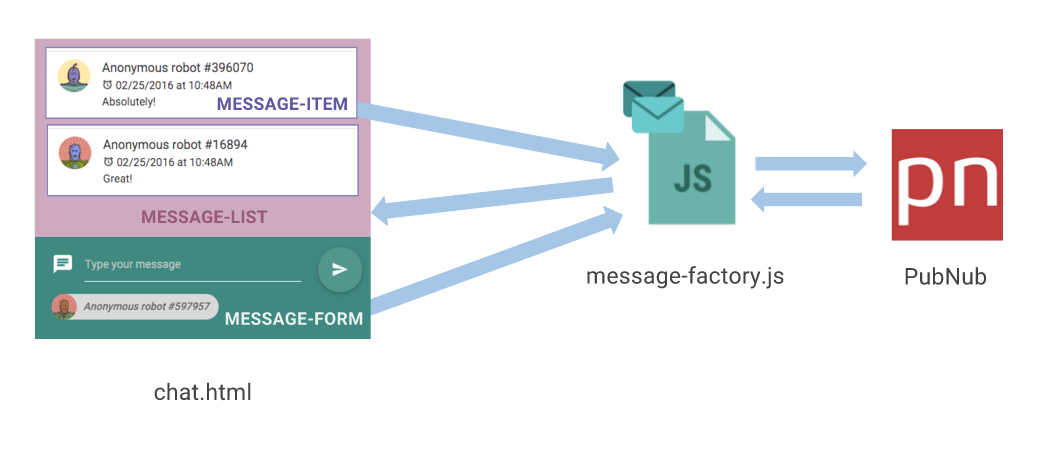
We introduce two things:
- A MessageService, which will be responsible for storing the messages and communicating directly with PubNub to retrieve them in real-time.
- A UI split in different directives so that we will be able to reuse the components we have built in the future. Plus, the directives will be able to communicate directly and independently with the MessageService.
Directory structure
This will be the structure of our app. Keep an eye on it so that it will be easier for you to understand where the files are stored:
Configuring PubNub at the App Level
First of all, let’s store the value of the uuid of the current user.
→ Create a Value service in services/current_user.js in order to retrieve the uuid of the current user:
angular.module('app')
.value('currentUser', _.random(1000000).toString());
Note that we are using the random function provided by the lodash library. It’s a useful tool for your javascript apps. In the rest of the tutorial, we will be using many more functions powered by lodash.
→ Then, to set up PubNub with your keys, create a file app.config.js and add this code:
angular.module('app')
.run(['Pubnub', 'currentUser', function(Pubnub, currentUser) {
  Pubnub.init({
    // Please signup to PubNub to use your own keys: https://admin.pubnub.com/signup
    publish_key: 'YOUR-PUBNUB-PUBLISH-KEY',
    subscribe_key: 'YOUR-PUBNUB-SUBSCRIBE-KEY',
    uuid: currentUser
  });
}]);
That’s it. The next time we will need to use PubNub anywhere in our app, it will be already configured.
Creating a Message Service
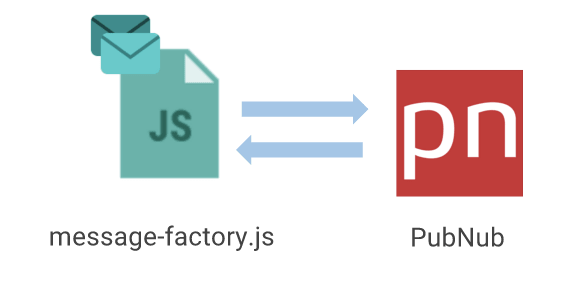
It’s time to store our data in the right place: a dedicated Message Service.
In the following part we will be using the $pubnubChannel object available since version 3.2.1 of the SDK. It allows AngularJS to communicate seamlessly with a PubNub channel with minimum number of step required.
If you want to learn how to build such a service from scratch, check out this quick tutorial: How to create a Message Service from scratch
Storing Messages with Storage & Playback
In order to enable storing messages being sent and to retrieve them once they are stored, you will need to first activate the PubNub Storage and Playback add-on in your app if you have not already.
Go to the Admin Dashboard; select the app you are working on and go to Application add-ons to enable Storage and Playback and configure the duration of how long messages are stored. It can be 1 day, 30 days or even forever. All messages will then be stored for every channel you publish into.
If you want to learn more about history API, you can watch the following video from the University of PubNub
Below is a code snippet showing you how to use the history method.
Pubnub.history({
   channel: ‘A-CHANNEL-NAME’,
   callback: function(payload){ console.log(‘I’m called when the history is fetched’)},
   count: 20, // number of messages to retrieve, 100 is the default
   reverse: false, // order to retrieve the messages, false is the default
   // You can define a timeframe for fetching the messages with START and END
   start: 13827485876355504 , // [OPTIONAL] starting timestamp to start retrieving the messages from
   end: 13827475876355504, // [OPTIONAL] ending timestamp to finish retrieving the messages from
})};
While building our Message Service, in the next part of this tutorial, we won’t be calling the history method directly as it is abstracted in the $pubnubChannel object. However, you can still call this methods if needed.
Building the Message Service
→ Create a MessageService that will return a $pubnubChannel object which will automatically store, receive and load the previous messages published in a channel.
→ Extend the $pubnubChannel object to add a sendMessage method that publish a message with additional information (uuid of the message, sender_uuid, date, etc..)
The code should looks something like this:
angular.module('app')
.factory('MessageService', ['$rootScope', '$pubnubChannel', 'currentUser',
    function MessageServiceFactory($rootScope, $pubnubChannel, currentUser) {
        // We create an extended $pubnubChannel channel object that add an additional sendMessage method
        // that publish a message with a predefined structure.
        var Channel = $pubnubChannel.$extend({
            sendMessage: function(messageContent) {
                return this.$publish({
                    uuid: (Date.now() + currentUser), // Add a uuid for each message sent to keep track of each message sent.
                    content: messageContent,
                    sender_uuid: currentUser,
                    date: Date.now()
                })
            }
        });
        return Channel('messages-channel', {
            autoload: 20,
            presence: true
        });
    }
]);
We will then be able to use the Message Service in any controller:
app.controller("ChatCtrl", ["$scope", "Scores", function($scope, MessageService) {
  $scope.messages = MessageService();
]);
Building the User Interface of the AngularJS Chat App
Now that our Message factory is ready, let’s create the chat UI.
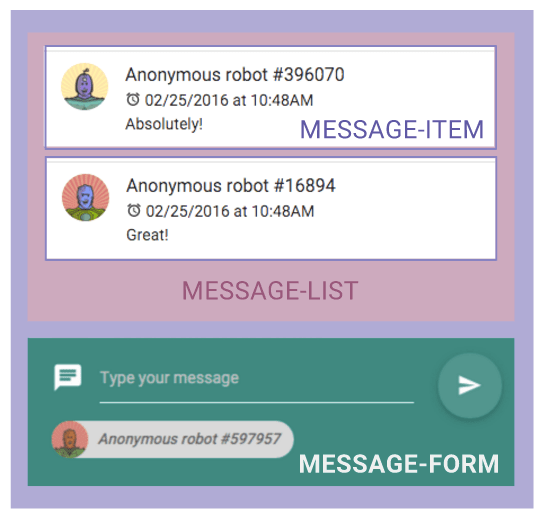
We will split out chat app in different components and each components will be able to communicate with our Message factory in different ways, whether sending a message, displaying the messages of fetching the previous one when the scroll is reaching the top of the screen.
Here is our chat app split into different components:
Chat View
→ In views/chat.html, copy and paste the following code to include the message-list and the message-form directives:
<div class="message-container">
 <message-list></message-list>
 <message-form></message-form>
</div>
Avatars
Let’s first create an user-avatar directive for displaying the avatar image by providing an user uuid parameter to the directive exactly like the following:
<user-avatar uuid="{{uuid}}"></user-avatar>
→ Add the following file in shared/user-avatar.directive.js
angular.module('app').directive('userAvatar', function() {
    return {
        restrict: "E",
        template: ‘ < img src = "{{avatarUrl}}"
        alt = "{{uuid}}"
        class = "circle" > ’,
        scope: {
            uuid: "@",
        },
        controller: function($scope) {
            // Generating a uniq avatar for the given uniq string provided using robohash.org service
            $scope.avatarUrl = '//robohash.org/' + $scope.uuid + '?set=set2&bgset=bg2&size=70x70';
        }
    };
});
Chat Form Directive

Let’s build the form of our app that will be responsible for sending the messages:
→ In message-form.directive.js, add the following content:
angular.module('app').directive('messageForm', function() {
    return {
        restrict: "E",
        replace: true,
        templateUrl: 'components/message-form/message-form.html',
        scope: {},
        controller: function($scope, currentUser, MessageService) {
            $scope.uuid = currentUser;
            $scope.messageContent = '';
            $scope.sendMessage = function() {
                MessageService.sendMessage($scope.messageContent);
                $scope.messageContent = '';
            }
        }
    };
});
→ And its corresponding template in message-form.html:
<div class="message-form">
 <form ng-submit="sendMessage()" class="container">
   <div class="row">
     <div class="input-field col s10">
       <i class="prefix mdi-communication-chat"></i>
       <input ng-model="messageContent" type="text" placeholder="Type your message" >
       <span class="chip left">
          <user-avatar uuid="{{uuid}}" />
        Anonymous robot #{{uuid}}
       </span>
     </div>
     <div class="input-field col s2">
       <button type="submit" class="waves-effect waves-light btn-floating btn-large">
         <i class="mdi-content-send"></i>
       </button>
     </div>
   </div>
  </form>
</div>
Displaying a Message Through a Message Item Directive

Let’s build a directive that will simply display a message in our message list :
→ In message-item.directive.js, add the following HTML content:
angular.module('app').directive('messageItem', function(MessageService) {
    return {
        restrict: "E",
        templateUrl: '/templates/directives/message-item.html',
        scope: {
            senderUuid: "@",
            content: "@",
            date: "@"
        }
    }
});
→ In message-item.html, add the following content:
<user-avatar uuid="{{senderUuid}}"/>
<span class="title">Anonymous robot #{{ senderUuid }}</span>
<p><i class="prefix mdi-action-alarm"></i> {{ date | date:"MM/dd/yyyy 'at' h:mma"}}</br> {{ content }}</p>
Note that we are calling the previously created <user-avatar/> directive.
Displaying the Messages
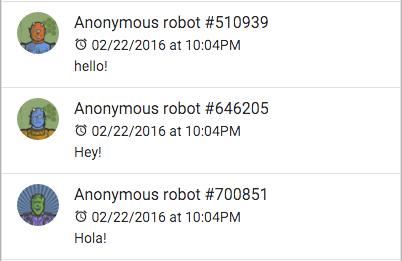
Finally, display the messages in the messages-list directive
→ Create a message-list directive that will expose the messages from the Message factory.
→ Create an init function that will be called to set up the component once it has been rendered.
The code of this directive should look like this:
angular.module('app').directive('messageList', function($timeout, $anchorScroll, MessageService, ngNotify) {
    return {
        restrict: "E",
        replace: true,
        templateUrl: 'components/message-list/message-list.html',
        link: function(scope, element, attrs, ctrl) {
            var element = angular.element(element)
            var init = function() {};
            init();
        },
        controller: function($scope) {
            $scope.messages = MessageService;
        }
    };
});
→ Then in message-list.html display the messages with an ng-repeat:
<ul class="message-list collection">
    <li class="collection-item message-item avatar" ng-repeat="message in messages track by message.uuid">
        <message-item id="{{message.uuid}}" content="{{message.content}}" sender-uuid="{{message.sender_uuid}}" date="{{message.date}}"></message-item>
    </li>
</ul>
Using track-by in the ng-repeat
Track-by has been introduced in AngularJS 1.2. and can really improve the performance of your ng-repeat. In the Message Factory, we are updating the message array from each side. We are pushing messages at the beginning and at the end of the array that may result in rebuilding all of the list.
As the list can contain more and more elements while we continuously fetch new ones via the infinite scroll feature, it can really impact the performance of your app.
Using track-by in your ng-repeat and providing an reference id for the messages you are mounting in the list is a really easy way to get a quick little boost in performance.
That’s it! Try it by yourself and you will see that it’s working. You may have also noticed that the user experience is not that great, but we can do better. This is what we will walk through in the next steps.
Autoscroll
When you build a chat app, it’s easy to make something work, but you probably don’t think about the small details that can make the user experience better.
AutoScroll is what it sounds like. The app UI will automatically scroll to the bottom when the message list is rendered and when a new message is received, so users constantly don’t have to manually scroll as new messages come in.
→ In the controller of the message-list directive, add a function that will change the position of the scroll to be at the bottom:
//...
controller: function($scope) {
    $scope.messages = MessageService;
    $scope.scrollToBottom = function() {
        var uuid_last_message = _.last($scope.messages).uuid;
        $anchorScroll(uuid_last_message);
    };
}
Unfortunately, AngularJS has some limitations and doesn’t provide hooks out of the box to notify us when an ng-repeat has rendered in the browser. We will have to use a home made directive.
→ In shared/repeat-complete.directive.js add this AngularJS directive that will notify us when an ng-repeat has finish being rendered.
→ In message-list.html, append the repeat-complete directive to the ng-repeat and specify the listDidRender() function to be called.
<ul class="message-list collection">
  <li class="collection-item message-item avatar" ng-repeat="message in messages track by message.uuid" repeat-complete="listDidRender()">
    <message-item id="{{message.uuid}}" content="{{message.content}}" sender-uuid="{{message.sender_uuid}}" date="{{message.date}}"></message-item>
  </li>
</ul>
→ In the controller of message-list.directive.js implement the listDidRender() to specify the behavior we want.
//..
controller: function($scope){

  $scope.messages = MessageService;
    // Hook that is called once the list is completely rendered
    $scope.listDidRender = function(){

          $scope.scrollToBottom();
    };
  //..
}
Have you noticed that if you are scrolling up to read the previous messages and someone is sending you a message in the meantime, the scroll is automatically pushed to the bottom?
Most of the chat apps don’t automatically scroll you down while your are reading the previous messages, so, let’s fix this.
→ In the controller of the message-list directive, add a scope variable called autoScrollDown
$scope.autoScrollDown = true;
We will turn this variable on when the scroll is at the bottom and turn it off when the scroll is NOT at the bottom.
→ Create a function that indicates if the scroll has reached the bottom.
var hasScrollReachedBottom = function() {
    return element.scrollTop() + element.innerHeight() >= element.prop('scrollHeight')
};
→ Then, bind the scroll event to a watchScroll function that will update the autoScrollDown value.
var watchScroll = function() {
   scope.autoScrollDown = hasScrollReachedBottom()
};
var init = function() {
   // …
   element.bind("scroll", _.throttle(watchScroll, 250));
};
Best practices regarding the scroll event:
It’s a very bad idea to bind the scroll event directly. The scroll event can be fired a lot (depending on the browser) and it can slow down the scroll if you trigger multiple actions in the watchScroll function. To prevent to perform this function during each single scroll event, you should wrap it in another function that will be acting as a timer. By chance, the Lodash library provides a function called throttle that does exactly what we want.
Fetching the Stored Messages When Scrolling Up
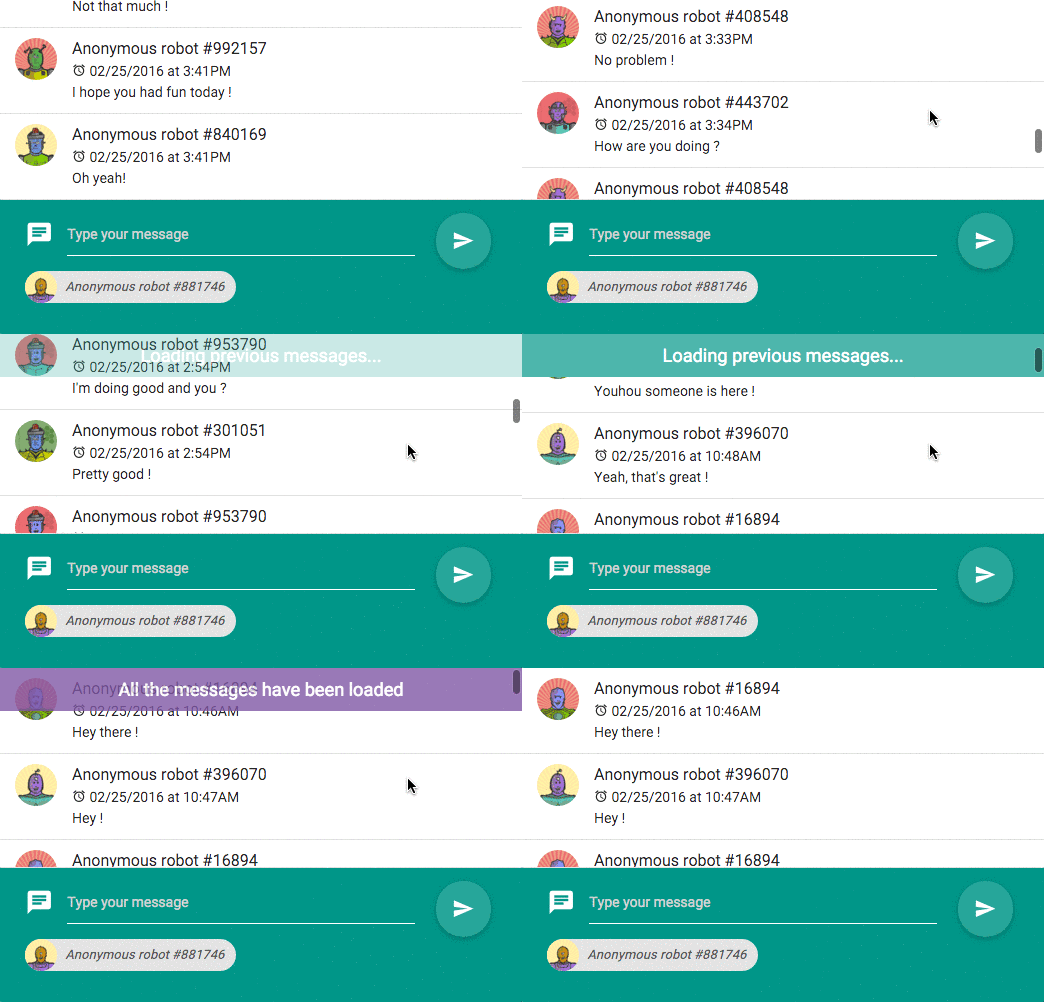
→ In the controller of message-list.directive.js update the listDidRender() function to only scroll to the bottom when the $scope.autoScrollDown variable is enabled.
//..
controller: function($scope){

  $scope.messages = MessageService;
    // Hook that is called once the list is completely rendered
    $scope.listDidRender = function(){
        if($scope.autoScrollDown)
          $scope.scrollToBottom();
    };
  //..
}
We are almost at the end of the tutorial. Now, we would like to call a function that will fetch the previous messages when you scroll up to the top.
→ Add a hasScrollReachedTop function that will check if the scroll has reached the top of the screen:
var hasScrollReachedTop = function() {
    return element.scrollTop() === 0;
};
In this chat app,we are using ng-notify to display the notification. You can use it as well. Just follow the instructions in the github repo of ng-notify, to setup ng-notify in your app.
→ Implement a fetchPreviousMessages that will display the notice “Loading previous messages” and fetch the previous messages from the Message Service.
var fetchPreviousMessages = function(){
  ngNotify.set('Loading previous messages...','success');
  var currentMessage = scope.messages[0].uuid.toString();
  scope.messages.$load(10);
};
→ Then, call this method in the watchScroll function when the scroll has reached the top.
var watchScroll = function() {
    if (hasScrollReachedTop()) {
        if (MessageService.messagesAllFetched()) {
            ngNotify.set('All the messages have been loaded', 'grimace');
        } else {
            fetchPreviousMessages();
        }
    }
    //...
};
Improving the Functionality
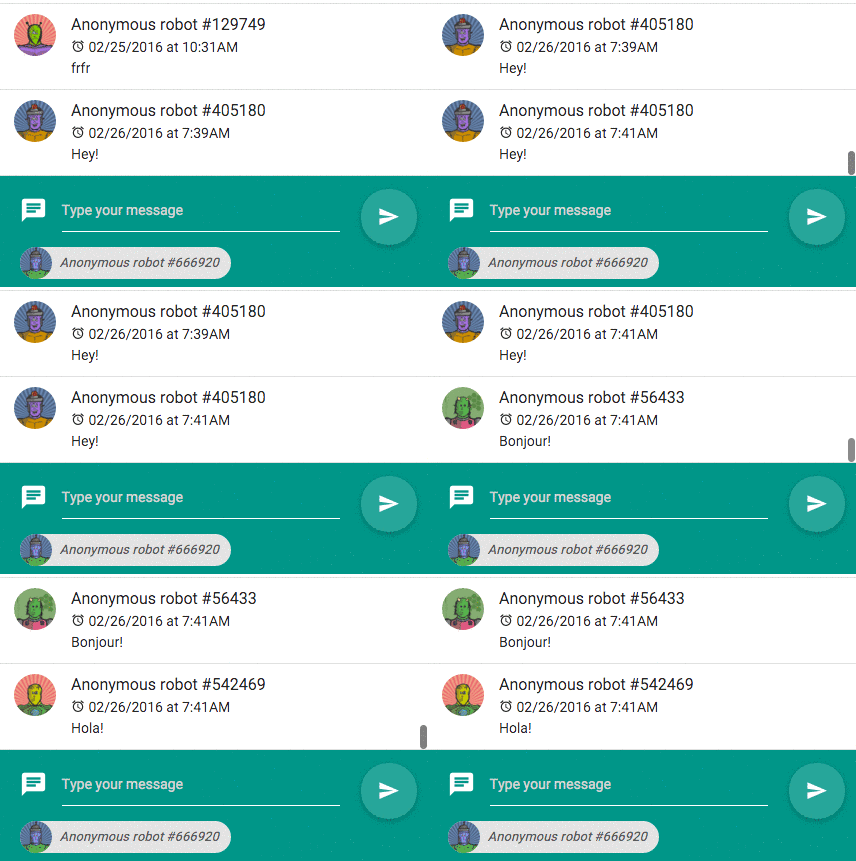
Have you tried to scroll to the top? Isn’t annoying to lose track of the last message displayed before loading the previous messages and also to need to scroll down again for fetching the next previous messages?
See how it can be annoying below:
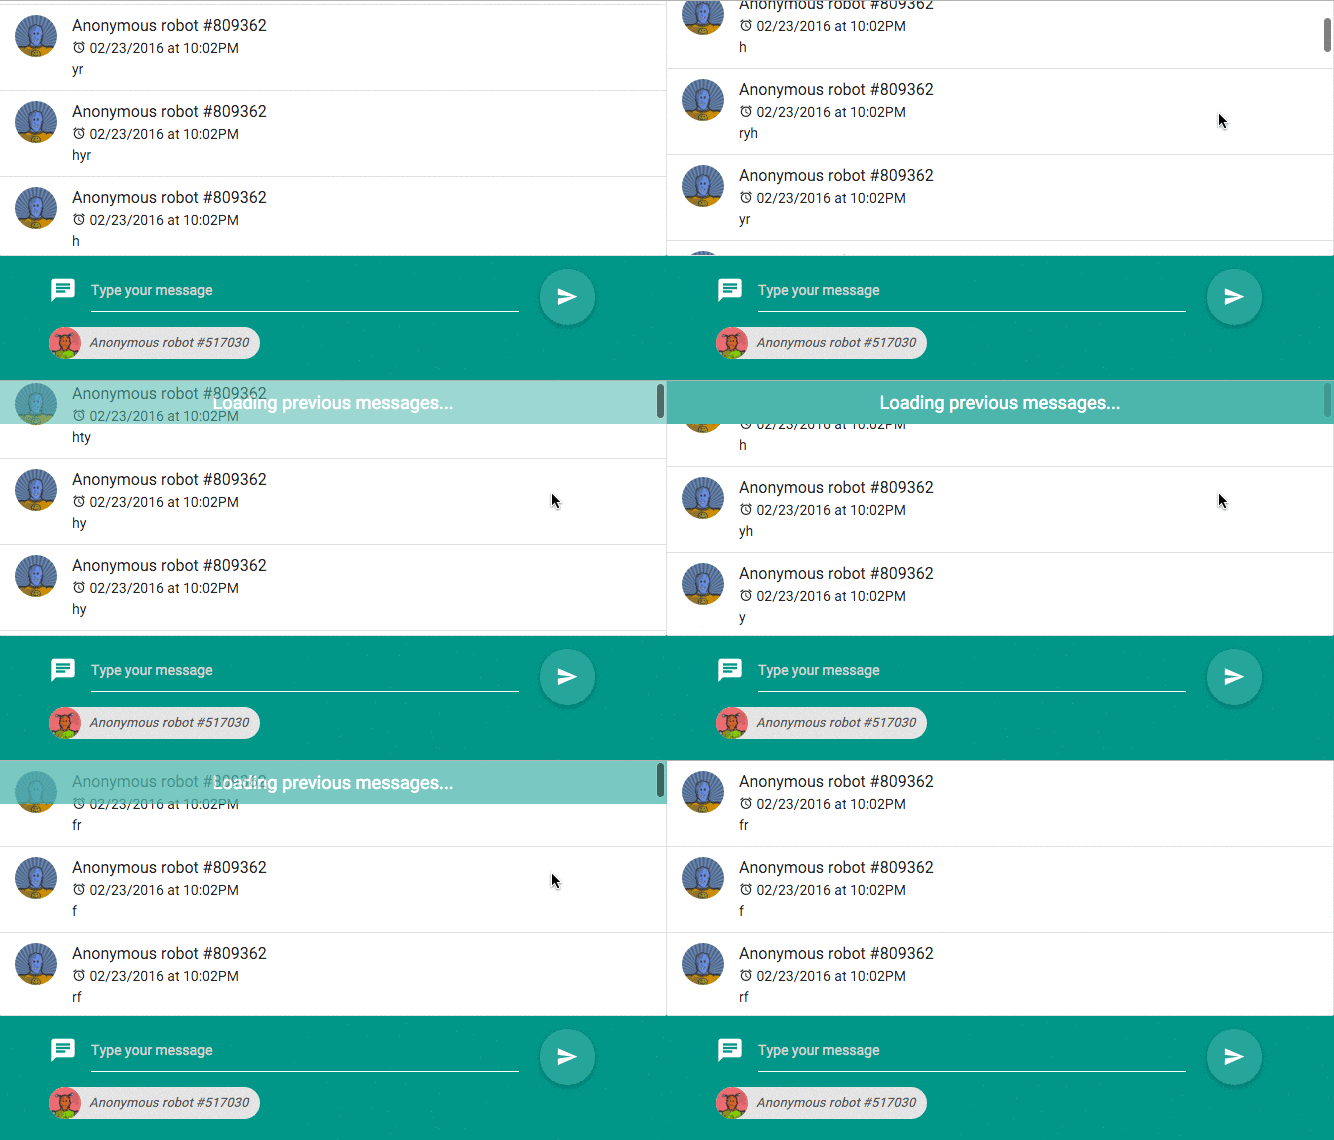
Let’s update our fetchPreviousMessages function to scroll down to the previous message displayed once the messages are loaded. The fetchPreviousMessages method of our service is returning a promise that we can use to chain an action.
→ Save the uuid of the last current message before loading the app and use the $anchorScroll(id) method provided by AngularJS to automatically scroll down to the particular message. Remember that we previously set an id to each message-item elements.
The updated code of the fetchPreviousMessages function will look like this:
var fetchPreviousMessages = function(){
  ngNotify.set('Loading previous messages...','success');
  var currentMessage = scope.messages[0].uuid.toString();
  scope.messages.$load(10).then(function(m){
    // Scroll to the previous message
    _.defer( function(){ $anchorScroll(currentMessage) });
  });
};
You probably thinking that the event rendering the new messages in the DOM is performed synchronously but it’s not always the case. It’s important to use a function that will guarantee pushing the execution of $anchorScroll at the end of the execution stack after the DOM has rendered the new batch of messages.
In our directive, we’ve used the _.defer(func) function from the Lodash library, but we can also simply use setTimout(func,0) (specifying 0 seconds as the time parameter), which performs exactly the same thing.
That’s it! You now have a complete chat app.
The next tutorial will walk through how to add a real-time roster that shows the people who are currently online and automatically updates when someone joins or leaves the chat app as you can see in the animation below.
